

From Lawn to Bloom: The Making of a Flower Garden No.1
How a strip of grass became a riot of colour, scent, and quiet joy — and what I learned about light, soil, and letting go of the plan.

Part One: I had a beautiful dream
What was the origin of the Flower Garden? A dream! Yes, I know, it sounds a more than a little corny. But it really was a beautiful, glowing dream. One of those dreams where you wake up actually smiling, and for a second, you really hope it was real.
In the dream, the garden was lit by that golden evening sun, the kind that flatters everything it touches. Blousy, romantic flowers shimmered in the light. Bees buzzed around lazily. Butterflies hovered over luminous leaves. And Jacq reached across a rose bush to snip a bloom for the house. Behind her padded Berkeley, our enormous, soft-as-a-marshmallow flat-coated retriever, sniffing the air and hoping there might be food involved. He always did associate secateurs with snacks.
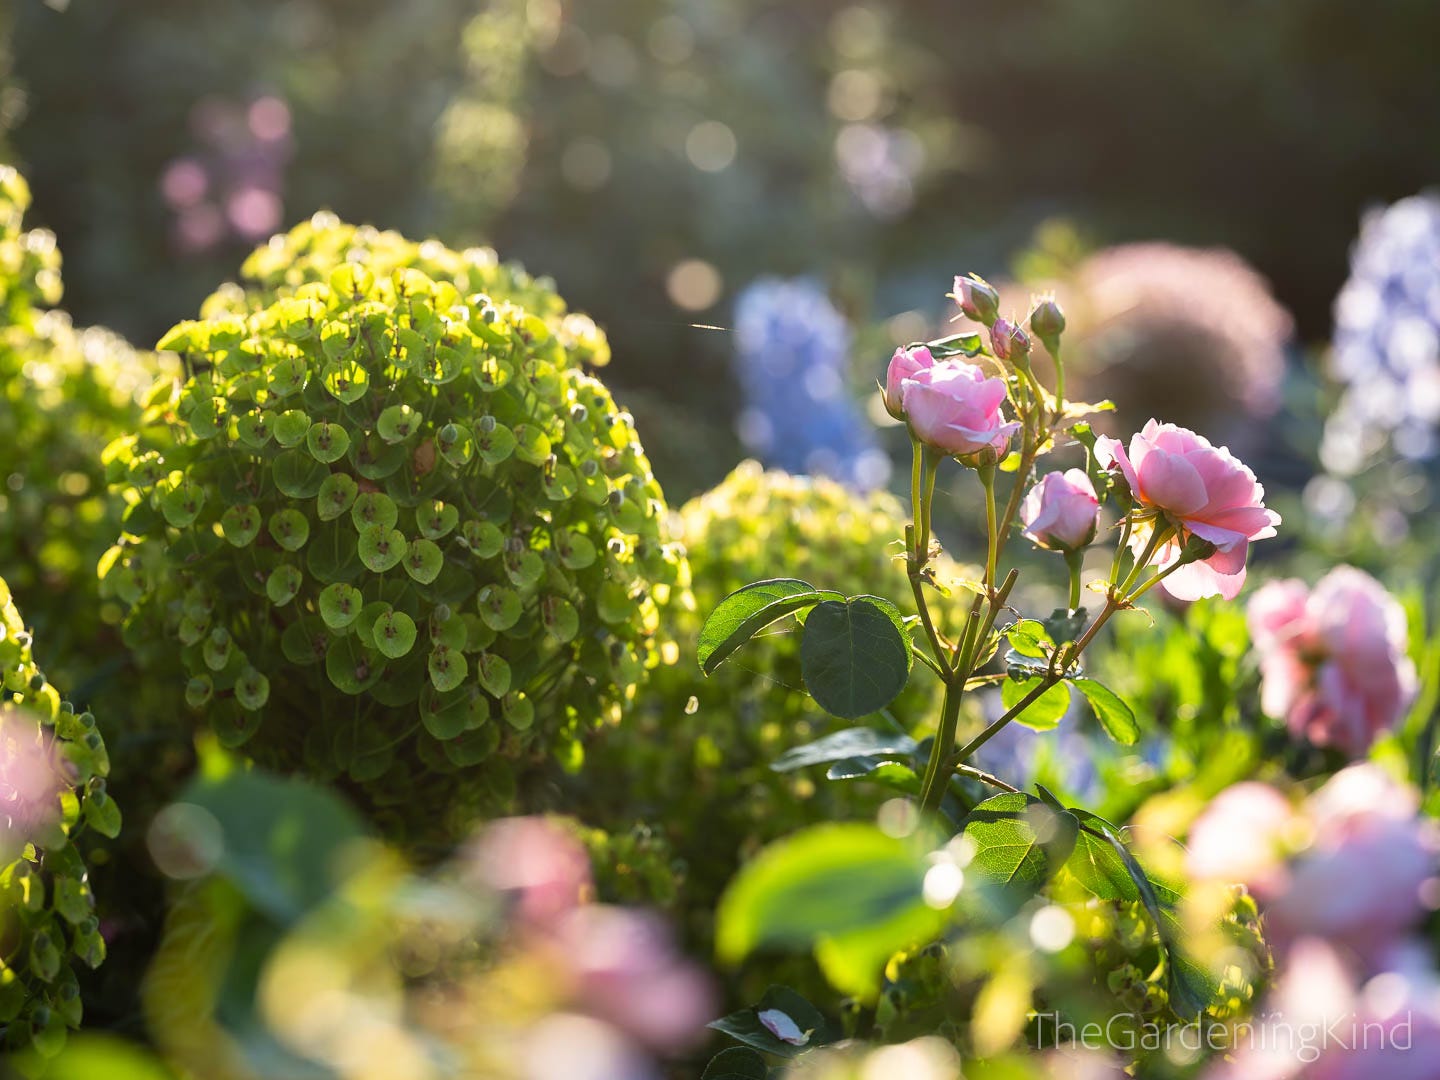
The dream was so vivid I could remember it all. The colours. The plants! There were pink roses, blue delphiniums, tall pinky-purple foxgloves, and a zesty chartreuse splash from euphorbia. I wrote it all down the moment I woke up, because I knew, without a shadow of a doubt, that I had to make this garden. Not should. Had to.
There were, of course, a few minor details still to work out. I had my “why”, but what about the how? And where? And, rather crucially, when?
The "How" (a.k.a. Not Digging, Just Winning)
A little earlier that year, I’d built the Kitchen Garden. Six timber raised beds, all in a neat 3x2 grid. I’d been binging Charles Dowding videos on YouTube and caught the no-dig bug. His enthusiasm is utterly contagious. Charles, if you don’t know him, is the (contemporary) godfather of the no-dig method: growing without disturbing the soil.
The idea is simple: lay thick, light-blocking cardboard over the grass or weeds. Cover it in a generous layer of compost. Then plant straight into that compost. The cardboard slowly breaks down, the compost settles, and the roots of your plants reach down into the undisturbed soil beneath, tapping straight into the soil-wide-web.
The grass and weeds beneath the cardboard die off and decompose. Meanwhile, the soil life underneath carries on unbothered. The worms and microscopic organisms do all the hard graft, digesting and blending everything together like an army of tiny rotavators. After one growing season, the mulch and the soil are practically indistinguishable.
And it works. It really works! No back-breaking digging, no churning up the soil, no fighting nature. You just give it the materials and a nudge in the right direction and nature does the rest. Gloriously.
Every garden has its nuances, of course. No two are exactly the same. But the no-dig method holds up across a wide range of soil types. Clay, chalk, loam, or that weird hybrid stuff we all pretend is "good enough”. No-dig can make it better.
The "Where"
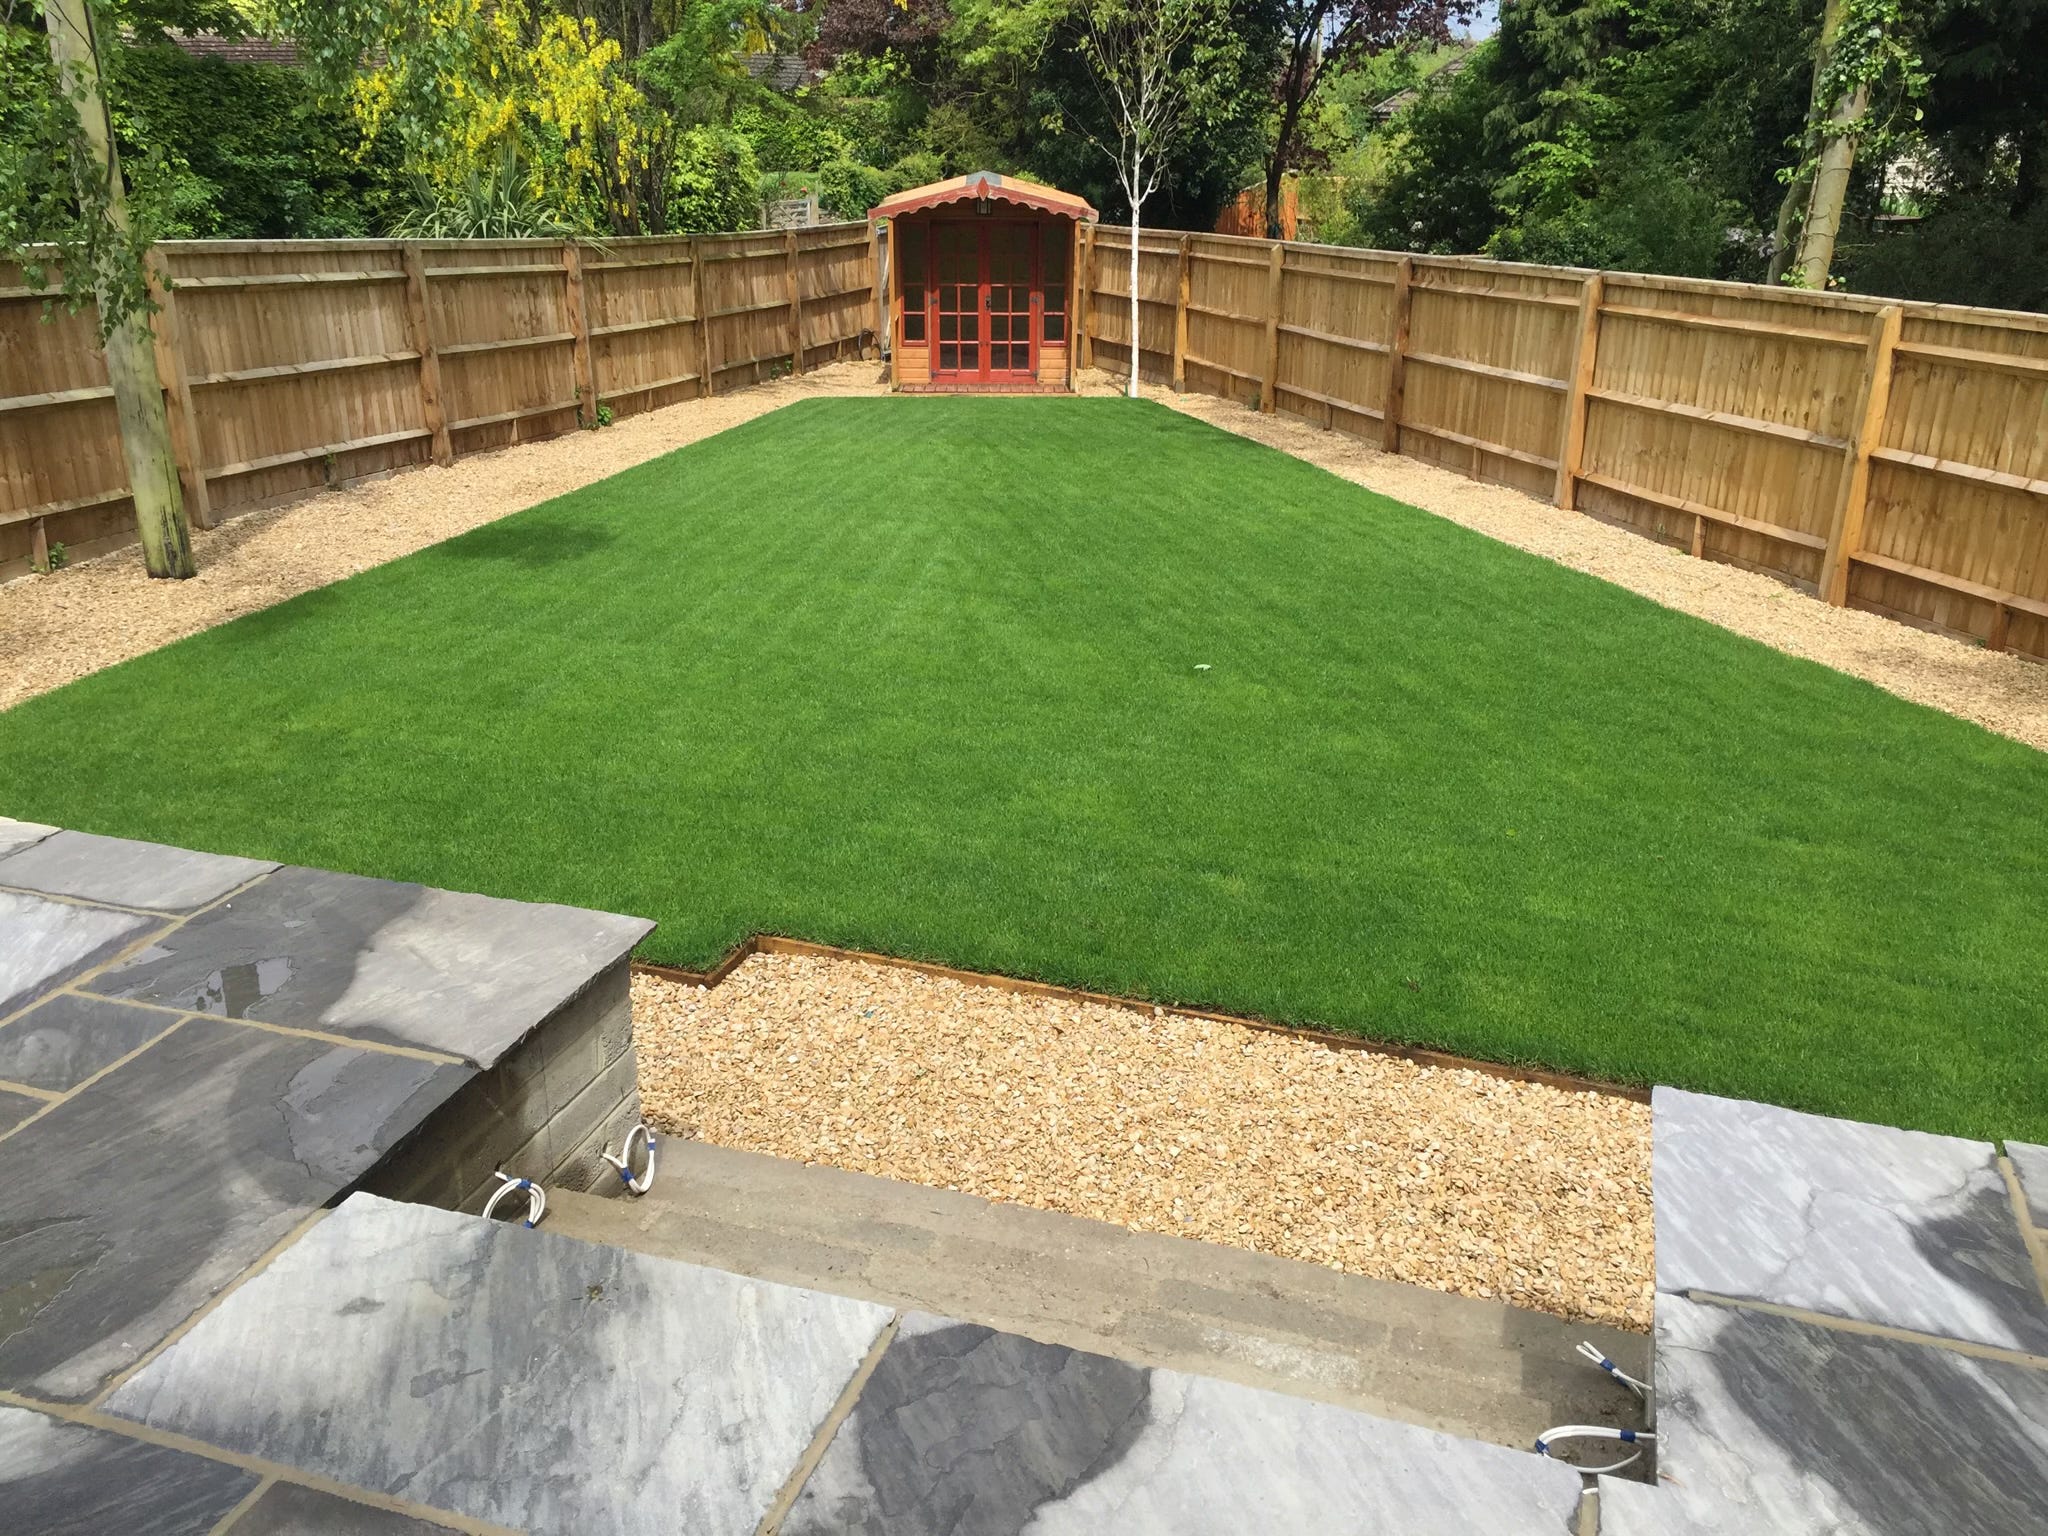
This part was easy. The front Cottage Garden? Already full. The Kitchen Garden? Ticking along nicely. The Courtyard? Too small. The Terrace Garden? Same. That left one big, open patch of ground at the back.
Or, to be more accurate, a bleak triangle of turf, edged in timber boards, circled by a gravel path, and hemmed in by close board fencing. It was about as lifeless and uninspiring as you could imagine. It wasn’t a garden. It was a yard. If it wasn’t for the grass, it would be a car park.
In fairness, it was only meant to be temporary, just a quick fix after clearing the monstrosity we’d inherited. And at the time, we weren’t really gardeners. I wasn’t even sure if we would be. But I had a hunch. A tiny spark.
The immediate goal back then was simple: a safe place for two enormous dogs to go bananas and, let’s be honest, leave their business. It doubled as a football pitch for our nephew, but mainly, it was for the dogs.
By the time I was ready to start imagining something more… garden-ish… Berkeley was in his twilight years. No more zoomies. Just long, slow wanders. Sniffing things. Rolling on sunny patches. Following Jacq as she gathered flowers or carried tea and biscuits to a bench. He only had two more summers, bless him. I like to think he enjoyed them.
The "When"
Ah yes, the million-pound question. Except, we didn’t have a million pounds. We barely had two. Money was tight. Covid had arrived, ending both our jobs, and upended our plans. We were not sure if we would even keep our house.
We were most assuredly hooked on gardening. Properly obsessed. And if I was going to create this dream garden, it had to be done slowly, creatively, frugally. We couldn’t afford to buy a hundred fully grown plants. I’d have to sow seeds. Take cuttings. Wait. Sounds easy enough, but patience is not my forte.
However, I pencilled it into the calendar: New Garden. Big bold letters. Right at the top of January. That gave me spring, summer, and autumn to grow whatever I could.
While everything germinated, I began plotting. Observing. Taking stock. Channeling my nerdish tendencies, researching like a man possessed. And possibly questioning my sanity more than once.
Next up: I needed to know what I was working with. The ground. The light. The exposure. The soil. A deep dive into all of that… coming in Part Two!
A thoroughly enjoyable read Elliott. Thank you.