
With four bays, I make well over 3m³ of free, highly nutritional, garden compost each year. That's enough compost to mulch all the Kitchen Garden beds (27m²) with a 7cm (3in) layer and have enough left for my spring bulb potting mix. I also keep a separate leafmould bay which is just the simplest compost ever!
You can start composting any time, but Spring and Summer are best. Read on to learn more...
Why compost?
In its simplest terms, composting recycles garden waste (and plant-based kitchen waste) into a beautiful, natural fuel for your garden plants. Garden compost can be spread over beds and borders as the most wonderfully beneficial mulch. Arguably the best there is! It's truly magical stuff, feeding plants and opening soil structure all by feeding soil life with this nutritious organic matter. Composting also increases biodiversity, providing food for innumerable creatures and adding to the web of life in your garden and beyond.
Above all, garden compost is sustainable!
Composters
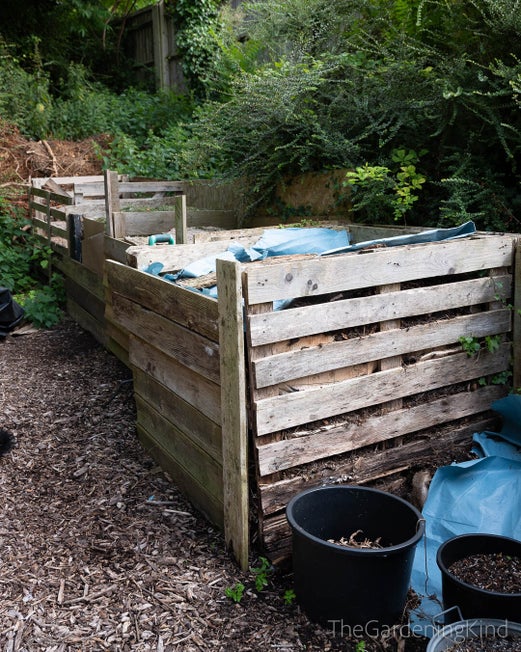
My compost bays are all constructed from scrap wood and pallets. A few posts concreted in the ground for longevity, with sides screwed in place, or simply wired together. They're not pretty, but they are functional, each measuring approx. w120cm x d120cm x h100cm - holding roughly 1.5m³.
You don’t need to spend a lot, or indeed anything if you can salvage a few pallets. Frankly, £70+ for a few pre-cut planks that slot together seems excessive for something that will just contain rotting ingredients! And how long before those planks start decaying?
I line the inside of my pallets with cardboard. You don’t need air circulation around the outside. In fact, this will just dry out the material around the edge which will then remain largely intact. Solid sides keep in valuable heat and moisture. Cardboard linings also stop the material falling through the gaps (in pallet sides) and slowly decomposes along with everything else.
Plastic Compost Bins
Purpose-built plastic composters are an option where space is limited. A quick search on Google or Amazon will give you a range of styles from Darlecs to Tumblers. They have a smaller physical footprint and cost upwards of £30. They're ideal for a small garden. To me, they seem a little awkward when you want to turn the contents and it’s difficult to gauge what is going on inside.
With plastic bins and 'darlecs', it looks far easier to lift the whole casing off, turn the contents in a wheelbarrow or on a tarpaulin, then refill the composter. If you do have space, wiring together four free pallets and using a slightly larger footprint is a better option for producing a greater quantity of (arguably) better compost.
Where should you put yours?
Ideally, composters and compost bays should be in a shady spot where conditions remain relatively stable. If you so happen to have a quiet, out of the way shady corner, that you still access regularly, then perfect. But, in reality, maybe the only spot you have is in full sun? Not a problem. So are mine. The only shady area I have is either next to the house or in the cottage garden, Do I want rotting waste next to open windows? No. Neither would I enjoy looking out of my windows to bays of compost! So, they're in a quiet corner, in the sun, but this is where covers come in very useful!
Covers
I always use a cover over my heaps, whether it’s a sheet of folded tarpaulin, a scrap of chipboard, or a thick layer of cardboard. Covers bring highly-underrated benefits to compost making. In the heat of summer, a cover prevents excessive evaporation but also insulates at night. Most importantly, a cover deflects excessive rain, so the only moisture within the heap is from the material itself. A common problem is compost heaps being too wet and they start to smell... bad! Interestingly, whenever I lift a cover, it always amazes me how many worms, molluscs, and invertebrates are living in the heap. It looks like I've interrupted a party as they dash for the dark corners. I guess they really enjoy having a roof over their heads!
Get it hot!
But not too hot!! Heaps around 1m³, filled within roughly eight weeks in summer will generate enough heat to kill even the toughest of weed seeds and weed roots. Temperature could easily pass 60℃ and nudge 70℃. Hotter than this and the heat will kill off essential fungal and microbial life. The compost will look lovely, be very dark and crumbly but largely devoid of life - think charcoal. Even though I put all kinds of weeds (including bindweed) in my heaps, because they often reach 60℃ or more, there is nothing left of them whatsoever by the time composting has finished and the heap has matured.
The sweet spot seems to be around 50-60℃, so invest in a compost thermometer and keep an eye on the gauge. Over time, the resting temperature will hover around 40-50℃. Without wanting to sound too nerdy, it’s fascinating watching the temperature climb within hours of adding new material to the heap. You'll notice the thermometer jump when you add lots of green material, like fresh grass clippings from the mower. When you stop adding to the heap and it's allowed to mature, the temperature will steadily fall until it equalises with the ambient temperature.
Winter Composting
A much longer process! The material is largely brown (rich in carbon, low in nitrogen) and there is less ambient heat, so decomposition is more fungal, rather than bacterial/microbial. Think about what’s on offer in the garden from November… Fallen leaves, twiggy prunings and dead herbaceous stems, maybe the last mow of the year? But, the resulting decomposition is beautiful and smells like a woodland floor after the rain… Lush! My summer heaps are ready to use as a wonderful rich ‘winter mulch’ in about 5-6 months. Winter heaps are ready in 10-12months, maybe longer if it's a particularly cold and dry winter and spring.
Leafmould
Thankfully, I have a garden with mature trees and it's surrounded by trees from neighbouring gardens. Every autumn, I harvest all the fallen leaves. I even sweep up leaves from the lane and footpath outside and ask the neighbours and my parents if I can collect their leaves too (and they're only too happy for this).
Then, I simply pour them all into their own dedicated heap/bay. An old recycled pumpkin crate with a wire mesh over the base. Just throw them in and leave. No other faffing is required, The leaves decompose very slowly, through fungal decomposition, perhaps taking a year in the open. Quicker if they are bagged up. The resulting compost is outstanding! Beautiful! True garden gold! The spring bulbs love it!
Note: I used to mow the leaves beforehand and although this did make better/finer leafmould, I since learned that a number of moths and butterfly caterpillars (including the outrageously beautiful Elephant Hawk-moth) overwinter in fallen leaves. Now, I make a point of only harvesting leaves from lawns, pathways, driveways, etc. and adding those leaves intact, With a few exceptions, I ignore leaves in the borders as it's a great natural mulch.
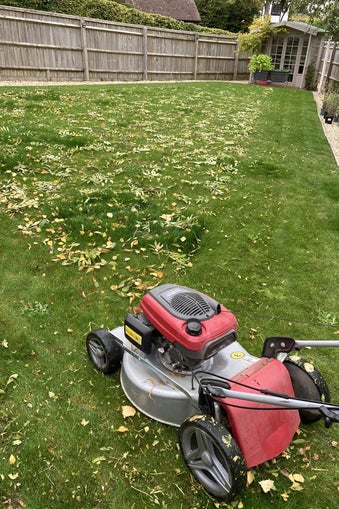
Gathering fallen leaves
Using a mower to quickly gather and mulch fallen leaves. Works best when the grass has already been cut short.
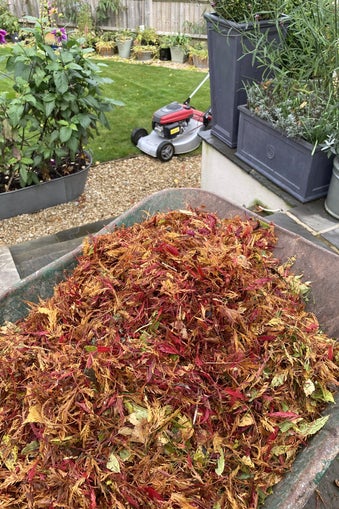
Harvesting fallen leaves from the terrace
After reading about moth and butterfly pupae overwintering in fallen leaves, I abandoned the mower for a good old rake and broom
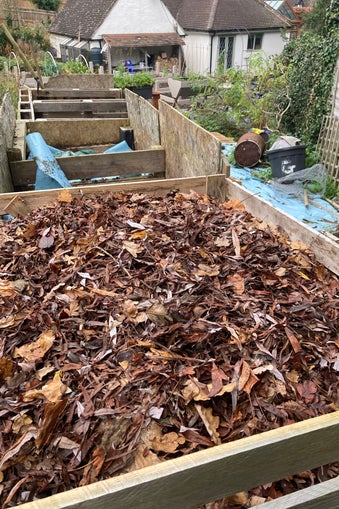
Leafmould Bay
Where the magic happens. Over a period of about once year, the leaves compost down into garden gold!
Avoid the slime
Many gardeners that try composting are demoralised after discovering they’ve created a stinking slimy pile. Basically, it’s just too wet. Technically, there is too much nitrogen (usually too much grass), and not enough carbon and oxygen. It's an anaerobic environment. The microbiome of your compost heap is healthiest when there's a good mix of green and brown materials, but air within the mix is critical.
The key is in the balance! It doesn’t have to be exact or scientific. Ignore that image in your mind of weighing scales and sieves. It's really rather simple and made overly complicated by 'influencers' looking to make every little thing sensational and dramatic. And you don't need 'compost starters' or 'activators'. Save your money!
The process should be simple. That way you're more likely to keep it up. Every time I throw on lawn clippings or lots of lush green leafy prunings, I also add a layer of brown: cardboard, dried plant stems, twigs, wood chippings, spent compost from old pots and planters, etc. That’s it! No measuring. Just guesstimating a ratio of 50/50 green v brown. Sometimes there's a little too much green in one go, but then I just add more brown the next time.
TIP! If you have room, make a little space to stock pile brown materials during the winter, so you have plenty to hand during the lushness of summer.
Keep it simple
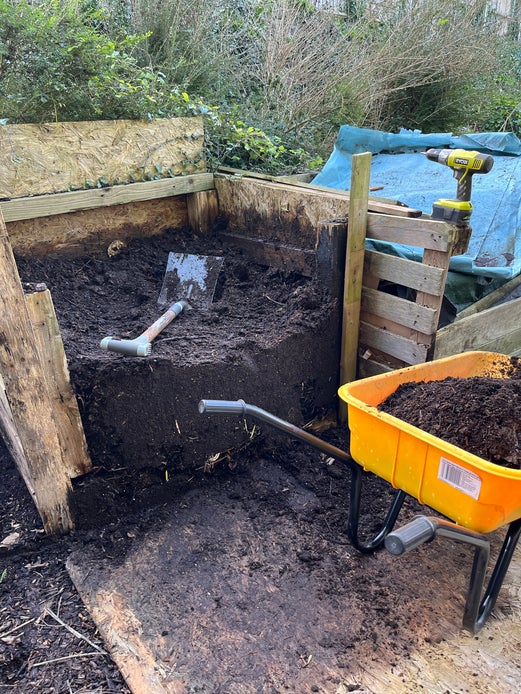
Let's not over-complicate a simple process. You can add material in layers - a trug full of green clippings, then a layer of cardboard or wood chips, for example. Materials do not need to be all finely shredded and mixed beforehand - although shredding/chipping does speed things up. But, for a quicker, easier addition, I’ve laid entire sheets of brown cardboard, and whole plants and they all just disappear, eventually decomposing with soil life doing a great job at mixing too. When I take the fronts of my compost bays, you can see the upper, most recent layers, but as you look down you can see it's a consistent fine brown compost and the distinct layers are now one. So layers work!
You only need to turn it once, so forget the elaborate line of compost bays, with heaps all turned sequentially, several times. One turn is enough to reincorporate material from the outer edge, into the middle, redistributing food and fuel for microbes and soil life. Turning also reinvigorates a compacted heap by circulating air - essential for a healthy microbiome. If you have just one heap, or a plastic bin, you can empty the whole bin on a garden sheet or tarp, mix up the ingredients with a garden fork, then refill it.
As you turn the heap, now is the time to check moisture. You can grab a handful (gloves recommended) and give it a squeeze. Ideally, a drop or two of liquid will be squeezed out. If it is bone dry and very pale, add a spray of water from the hose as you turn the heap.
Once you start making compost and get the knack, you're always on the look out for potential ingredients/fuel. The 'winter tidy' becomes a winter harvest! Grass clippings are rocket fuel. Storm damaged stems are an unexpected bounty! Kitchen scraps are no longer just waste! At the same time, don't get caught up in the minutia of ingredients: I've read articles saying that you need to add X as it has X nutrients, or that bananas are great because they have potassium, etc. A wide and diverse blend of materials create a rich and diverse compost. That's all you need to know. Avoid analysis paralysis!
Green Ingredients
- Kitchen vegetable and fruit scraps
- Tea bags and coffee grounds
- All weeds (even perennials with roots)
- Grass clippings
- Leafy prunings
- Deadheaded blooms
- Leaves with blight or rust, etc.
- Essentially, I put everything vegetative on the heap
Brown ingredients:
- Brown, uncoloured, unlaminated cardboard from boxes
(all sellotape and stables removed) - Loo and kitchen rolls
- Wood chippings (either my own or delivered by a local tree surgeon)
- Woody, brown stems and twigs chopped up
- Some fallen leaves but I have a separate leaf mould bay for the majority of the autumn leaf fall,
- Spent compost from pots and planters
- Wood ash (I only burn natural wood)
TIP: Don’t worry about weed roots. As long as they are buried quickly they will die and decompose, just like everything else. They are not indestructible! Blight and rust are fungal diseases that infect living plant tissue and wont survive a hot composting. I have been composting this way for years and the garden isn’t inundated with diseases! It’s healthier than ever!
TIP: If you are concerned about pests and vermin, bury any kitchen waste quickly with other materials. Do not add any meat, dairy, or cooked carbs as this will definitely attract unsavoury characters.

Active compost heap with a fresh addition of grass clippings. The thermometer is hitting 60℃

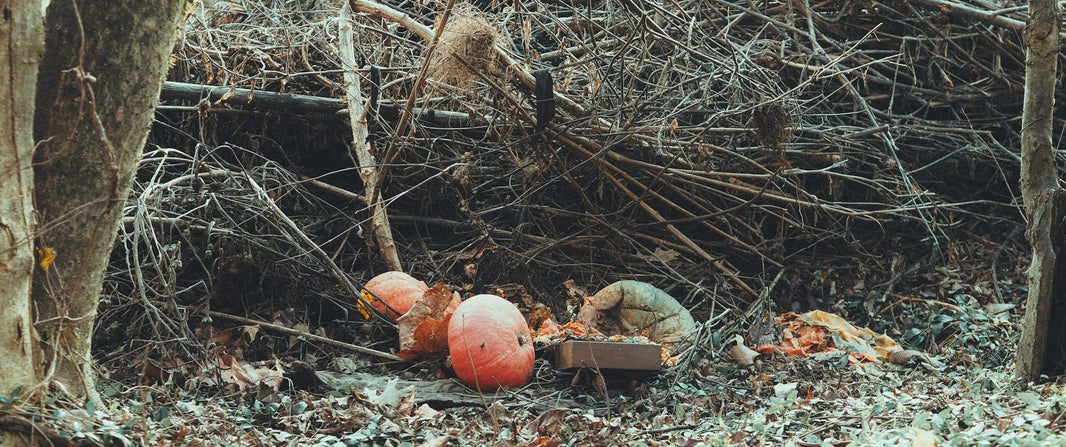
Maturing heap, gently rotting down with lots of stems and raw material still visible.

Matured heap. Ready to use. It's cool, dark, crumbly, with lots of invertebrates living inside.
Finally... when is it ready?
Matured compost is ready to use when it's cool to the touch, dark, crumbly, and smells of woodland in autumn. It is lovely and unctuous and feels good to the touch. It shouldn't be smelly, sloppy, or claggy. You'll see extremely wriggly red worms on the surface, along with other creatures like woodlice, centipedes, etc. Young heaps generate too much heat for these creatures to live there. Once it's matured, cooled and stable, they move in.
Your finished compost won't be as fine as shop-bought compost. This has been dried, milled, and sieved, Your homemade compost may well be chunky with woodier stems still intact, but that is absolutely fine. Once you've spread the compost on your beds and borders, soil life will continue the decomposition process and they'll eventually disappear into the ground. If your pride cannot tolerate 'lumpy' compost, add the woody bits to the next heap as a 'starter' for your next batch.
My compost is spread as mulch on my vegetable beds, raw and lumpy straight from the heap. For my potting-mix, I sieve the compost to 10mm to remove the larger chunks. A 4mm sieve will give you compost fine enough for sowing seeds, but you'll need to allow the compost to dry out somewhat first.
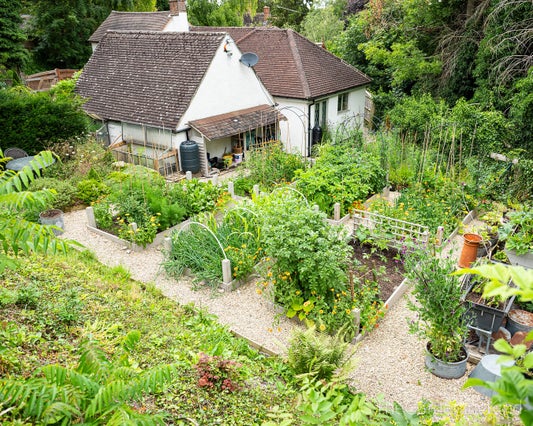
I make my own garden compost primarily for the six raised beds in the Kitchen Garden (above) and for planting spring bulbs in pots. I carry out both of these tasks around the same time, in early winter (usually end of November or early December). I don't need to make 'fast' compost. All I need is a supply that is ready to use once a year. If you need a regular supply, there are 'fast composting' methods that involve shredding everything before adding and turning the pile every couple of days.
Add comment
Comments